
English Below
SAS Knits It Again zag een aankondiging van de goedgemutste breicampagne van een van haar lievelings drankjes. Breien voor een goed doel met humor én vers fruit. Nou, da's een heleboel goeds op een bergje. Dus vandaar.... Doen jullie mee? Als je ooit in je leven gebreid hebt, kun je meedoen. Verder geen restricties. Het wordt geen échte breiles, maar er is hulp als het even moeilijk gaat. Neem je restjes en naalden mee als je ze hebt, maar er is ook materiaal aanwezig om -gratis- te gebruiken.
Er is koffie/thee/lekkers. Je moet je harde werk wel af kunnen staan dus neem je camera mee om je project(jes) op te slaan voor het thuisfront en het nageslacht!
Neem ook breinaalden en restjes mee. Hoe meer spul hoe meer inspiratie!
Nog meer leuks: voor elk ingeleverd mutsje krijg je alvast twee stempels op een SAS K.I.A. brei-materialen-strippenka

Van de Innocent site:
De Goedgemutste Breicampagne is een actie voor het goede doel. Samen met het Nationaal Ouderenfonds willen we proberen om zoveel mogelijk gezellige kerstdiners te organiseren voor eenzame ouderen.
In Nederland voelen meer dan een miljoen ouderen zich af en toe eenzaam. Eén op de vijf brengt de kerstdagen alleen door. Speciaal voor deze mensen organiseert Het Nationaal Ouderenfonds kerstdiners. Voor een beetje gezelligheid en warmte.
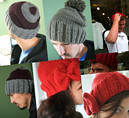
Zo werkt het: in november zetten we op al onze kleine flesjes een klein wollen mutsje. Voor elke verkochte gemutste smoothie doneren we 20 cent aan de kerstdiners van het Nationaal Ouderenfonds.
http://www.innocentdrinks.
op facebook:
evenementpagina met meer info: http://www.facebook.com/event.php?eid=128300227266645
http://www.facebook.com/in
http://www.sasknitsitagain

--------------------- SAS Knits It Again is organising a mini-hat-knit-workshop for Innocent Smoothies' the Big Knit Campaign. Join us! It's free. Small hats! Help lonely elderly people out. For every sold bottle with handknit hat Innocent will donate 20 cents to the National Fund for the Eldery (free form translation...)


 Jackll & hide
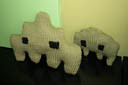 Space Invader
 Easypeasycozywozy
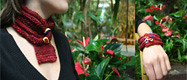
 NicoNeckPiece
 Basic Baby Hat


